When you consider how much we rely on tools made out of metal, it’s safe to say that blacksmithing is one of the most important survival skills to learn. If you’re not satisfied with the best felling axes on the market, or you simply want to try honing your skills as a blacksmith, learning how to make an axe can be a fun project, and an invaluable skill to have. Most people will learn how to forge and weld in a pro workshop, where it will be very easy to control the temperature during the forging process. However, this guide that I’ve created includes a simple plan for making your own axe, so even those without any prior blacksmithing skills can easily forge their own axe in a matter of hours, with the right tools and materials.
Forge
Even if you do have professional workshop skills, it can still be a little tricky to do this job in your home workshop, simply because it can be difficult to control the temperature. You’ll also need to have a lot of patience to forge using a DIY metal furnace since you won’t have a torch to use to quickly heat up portions of the metal. If you’re serious about blacksmithing, you can purchase a forge, ready-made, however, they can be on the pricey side. Additionally, you’ll need to have a good grinder on hand for sharp, clean edges.
If possible, I recommend learning forging and welding from a pro before you attempt to make your own axe. There are probably many local workshops you can take at community colleges.
If you already have some basic forging and welding knowledge, then you can give this project a shot.
Project Supplies
For this type of project, you’ll need four things:
- Heat
- A tool to hold the metal
- Anvil
- Hammer
Heat
As you may already know, heat will begin to melt at 2750 degrees. You won’t need to get your forge up to this very high temperature for this project. Ideally, you’ll want to keep the temperature under 2500 degrees for steel, so it doesn’t start to liquefy. When foraging your axe, you don’t have to use steel, you can use other types of metal, such as ones that begin to melt at a lower temperature. As an example, aluminum will begin to melt at around 1200 degrees. This type of material isn’t going to be nearly as tough as steel though. Typically, aluminum is mainly used for casting, not foraging.
A Tool to Hold the Metal
Purchase a pair of strong tongs or grips to hold the metal you’ll be foraging into an axe. You don’t want to use tongs that will begin to melt as soon as they touch the metal you’re working on. Some people will use gloved hands, but this will only work if you have a long piece of metal so the end that you’re holding won’t transfer heat from the furnace. Basically, to make your own axe, you’ll need a pair of sturdy tongs.
Anvil
An anvil is what you’ll place your metal on top of while you’re working. The anvil you use must be incredibly heavy and able to withstand all the hammering you’re going to be doing on top of it.
Hammer
A hammer is needed to bang the heated metal into the right shape. Anything else that applies force and is strong will work.
Building a Forge
In order for a forge to get steel hot enough to make it molten, it requires air and fuel. A modern forge will use gas. However, you can use charcoal or even coal for a DIY forge. However, controlling the heat won’t be as simple.
To build your own forge, you’ll need the following:
- Fire pot
- Ash drainage pipe
- Charcoal or coal
- Moving air
Fire Pot
This is basically just a tough round basin that can hold hot coals. You can make a basin out of a variety of supplies you have around the workshop, including an old, unused barbeque. Keep in mind, you’ll need to drill some holes through the basin for airflow.
Ash Drainage
You’ll need to insert a pipe in the bottom of the forge to allow the ash to fall out. You’ll also need some mesh wire that you can place over the ash drainage pipe, preventing the coal from falling out.
Moving Air
This can easily be accomplished by hooking up a pipe to the basin, then using a hair dryer to blow some air in. This moving air is important because it will help to get the coals so hot, they can melt metal.
Getting Started

Now that you’ve made your own forge, you can get started making the most important part of an axe. The forge can also be used later on to make different tools.
Once you’re ready, the first step of the project is determining how you want to connect the handle to the head. If you know how to replace an axe handle already, then this step should be a cinch. If you don’t then this will be another important skill that you’ll learn.
Every tool that was made in olden times had a hole where the handle would go through, which was very convenient. If the head of the axe broke, then all you had to do was just slip a new one onto the same handle. However, there are a few other ways to attach a handle to an axe head. Yet, the hole method is still the best and the easiest.
This method ensures that the axe head will not go flying off during use. Keep in mind that the connection between the handle and the axe head requires a lot of pressure. You want to avoid making a weak connection.
Folding Method- Carbon Steel
The folding method involves folding mild steel around a drift for the eye, as opposed to punching an eye through a chunk of stock steel. With the folding method, you’ll insert a small slab of high carbon steel between a couple of ends, then forge weld the layers together into solid steel that has a high carbon center. This carbon center allows for good edge retention and a solid edge, making it one of the most important parts of an axe.
Using a carbon insert is a smart choice since it will also minimize the cost of the axe head compared to a head that’s made entirely out of carbon steel. Keep in mind, tactical axes are made much differently than a traditional axe and are usually cut from sheet steel, then they’re hardened, shaped, and sharpened. A tomahawk is often made out of high carbon steel and doesn’t require a high carbon insert. They’re basically just shaped, hardened, and sharpened. There are different forging and welding processes used, depending on whether you want a traditional axe, splitting axe, felling axe, tomahawk or tactical axe.
The Method
You’ll begin forging with a piece of mild steel that’s around eleven inches long, 3/8 inches thick and two inches wide. For forging steel, you’ll want to reach a temperature of twelve hundred degrees. The metal will appear red and yellow in color. If you heat the metal for too long it can accidentally remove a lot of the carbon content, which is exactly what you want to avoid since this can ruin the steel. If the metal isn’t heated enough it can be very difficult to work with and may end up damaging your hammer.
Once you try this method a couple of times, you’ll know you’ve reached the right temperature just by the color alone. If you want to ensure you achieve the ideal temperature your first time around, then purchase an infrared thermometer. Begin by heating slowly, to allow the heat to evenly disperse throughout the steel, flipping and turning the steel every few minutes. Keep in mind that throughout the process, you’ll need to keep the temperature consistent and reheat when necessary.
Inserting a Slab of Carbon Steel

Once the steel is properly heated, you can take it off the forge and start bending it. Keep the ends even. However, there’s no need to worry if the ends are off a little since you can always fix it later on in the process, when you’re shaping it.
Before you can close the ends, you need to insert a slab of carbon steel and add some borax between the layer. During this time, some people will also punch a couple of holes through each layer and add some chunks of steel rod. This is done to keep everything in place. This is a great trick for high-quality axes since it adds to the quality factor. However, for your first axe you can skip that step.
When the ends are closed down onto the slab of steel and borax, place it back into the forge and heat it up again. Take it off the forge and add more borax and start hammering the layers together. Make sure that you maintain the temperature for this part of the process.
The process itself is fairly long and will require you to reheat several times. This process will force each of the layers to become one. During this time, the eye you created may get a little misshapen. This is perfectly fine since once you’re done welding these layers together, you can reinsert the drift for a proper shape.
Many pros recommend doing some of the welding with the drift inserted. On older axes, you may find that where the sides meet it has started to split. This split eventually can turn into a break, so it’s crucial that you ensure the weld of the steel that’s closest to the eye is well worked. Make sure that you insert the drift from the top and the bottom of the eye to make certain it remains even on the inside.
Once the welding process has been completed, you can start hammering out the shape of the axe head. You can leave the eye drift in, to hold the eye shape, which will provide a better visual for the design.
Shaping
The shaping process can take a bit of time and requires several reheatings. This process will ensure a proper welding of the layers.
Shaping the head will require finishing work. Just be patient and take it slow, paying attention to the heat levels.
Once the axe head has been welded and the shape has been roughed out you can take it back to the proper temperature and start thinning and smoothing out the edge of the blade. Remember, it’s not going to be perfect here. You don’t have to worry about that at this point since there will be a final shaping step.
The edge of the rough axe head must be tempered and hardened which helps to create a balance between being too hard and too soft. Allow edge retention while helping to prevent fracturing and chipping. This will go a long way toward extending the life of your axe.
To harden, you’ll need to heat the edged side of the axe up to eight hundred degrees, allowing it to heat up evenly and slowly, turning and flipping it every few minutes. Bring it to a nice red glow. This is when the carbon will basically dissolve into the ferrite structure.
Quench
When you’re at this point, you can remove the axe from the forge, dipping it into a bucket of water to rapidly cool the steel hardening. This will lock the carbon atoms in closely with the iron atoms, making the steel very hard.
If you allow the head to cool down very slowly, then the carbon atoms that were by the iron atoms will have had time to pull away, which will loosen the grain and soften the steel. This technique can come in handy if you’re restoring an old axe that’s been badly damaged.
Tempering
Heating up the axe to two hundred and thirty degrees for a few hours reduces the stress that’s left in the steel from the hardening process and ends up reducing the hardness, while reducing the brittleness.
At this point, your axe head may not look very appealing, but that’s what the finishing process is for. Some people may leave their axe in this state and put a good edge on it. This is where personal preference comes into play. Others will sand it down so that it’s clean and smooth and allow it to grow a patina over time. It’s really up to you.
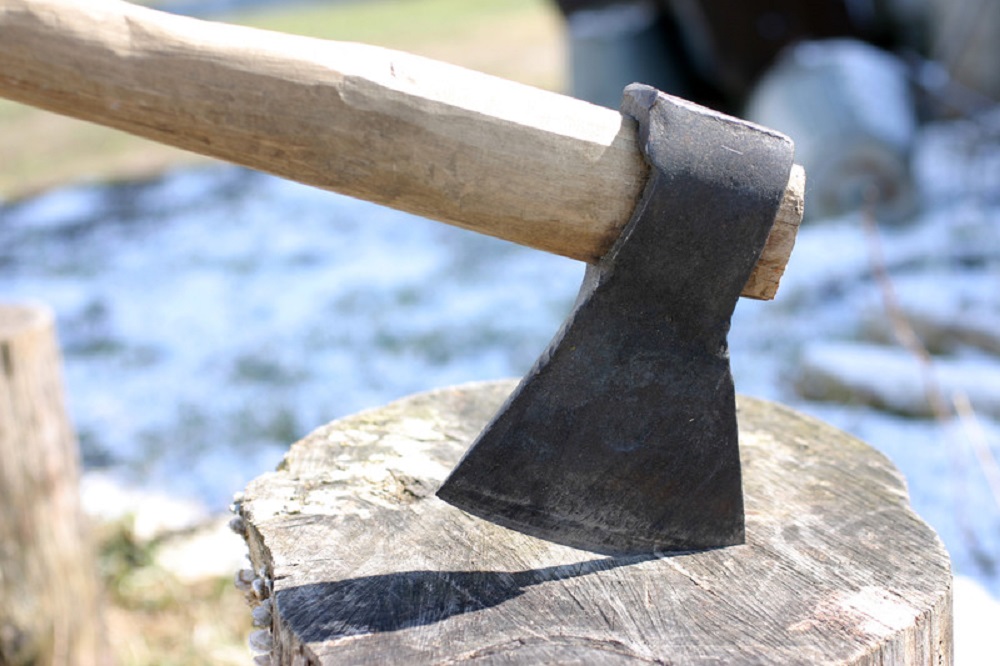
All that’s left is sharpening the axe head and fitting the handle. What you choose for the handle is also a matter of personal preference. Wood or steel are the most common materials used. However, you’ll find that steel, while more durable, can make the axe more uncomfortable to use since you’ll feel every strike.
Steel Options
When it comes to steel, there are many options to choose from, including scrap, basic carbon steel and alloys. Most commercial axes are made out of different types of stainless steel, usually from the four hundred series of steels. The steel must contain at least twelve percent chromium to be considered stainless. Stainless steels are much softer than carbon steel, but they also have a higher level of resistance to corrosion due to the added chromium.
Stainless steel has a moderate edge retention because of the softness of the metal. These steels are often a good choice for cutlery or knives, but many pros don’t prefer this metal for their axe. A professional axe maker will use carbon steel, which has been used for axe heads for centuries throughout history, just keep in mind, it’s on the pricey side.
Final Thoughts
Learning how to make an axe takes plenty of skill, patience, and attention to detail. You can experiment making your own axe heads using scrap metal, carbon steel, stainless, and a variety of alloys. The choice is really yours. When you make your own axe, you’ll feel a sense of accomplishment. Even if you don’t have much interest in blacksmithing, you should try making an axe at least once. Many blacksmith shops and local community colleges offer courses that you can take to learn how to make an axe or knife. It’s great knowledge to have and you never know when this skill will come in handy.
source https://woodcutterhq.com/how-to-make-an-axe/
No comments:
Post a Comment